Showing posts with label Sew Sweetness Bags. Show all posts

02 January 2015

Last finish of 2014

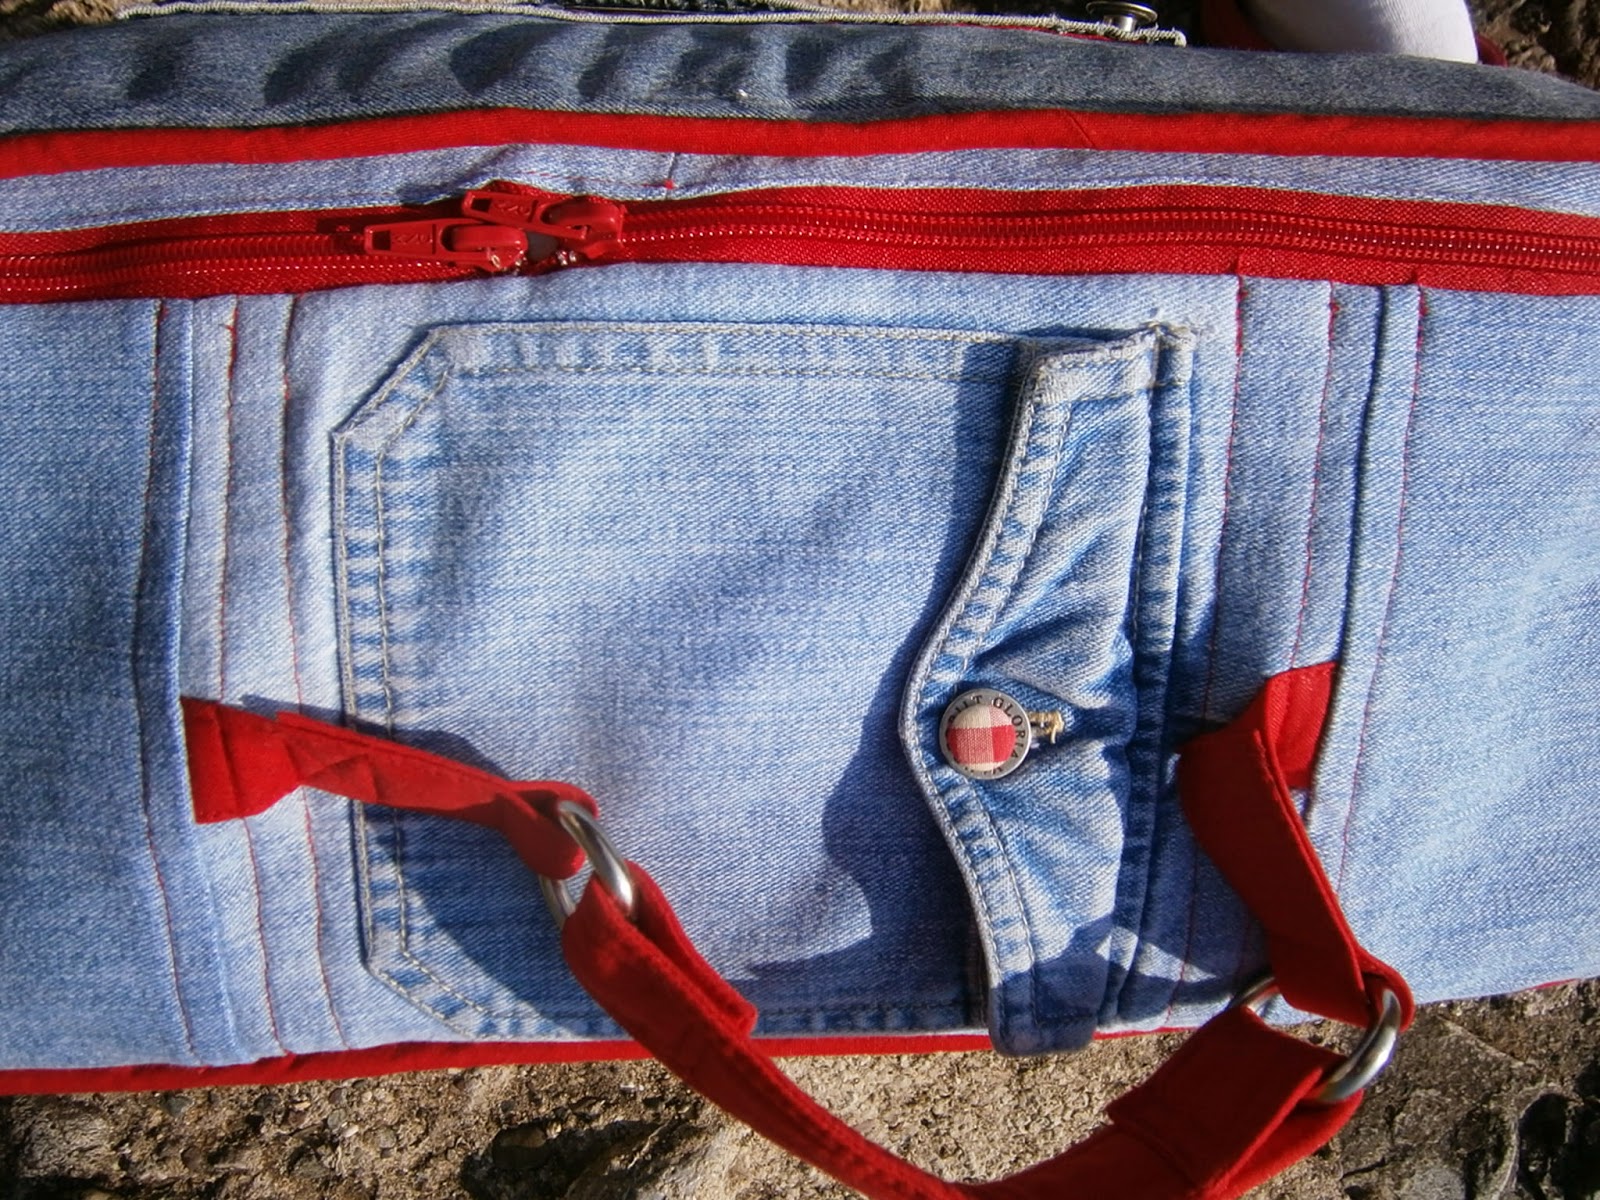
I was able to make one last finish for the year.  Mustang Sound Check bag!
My favorite bag pattern from the book Big City Bags, is this one, the previous one that I had made, my Collage Sound Check bag,

I ended up giving that to my daughter's NoNa (godmother) she said her favorite color was purple (or Mauve in Greek) and I didn't really have any other purple fabrics so I gave it a good wash and gave it to her, I loved that bag, so I am happy in giving it to her.

My daughter loves her NoNa, and no wonder she lets her play with her phone.
I used Coats Thread for the first time, I won a wonderful package of them as the winner in November's Big City Bags SAL.  I am excited to use them, since I have heard it is better to use Polyester thread for garment making.
Of course no bag is complete with out some of Janelle's bag bling from Emmaline Bags.
 For the interior I decided to have a little fun and with one side of pockets I just left the selvage on and sewed it in at the bottom, I will be adding my name to it when I find one of those archival/fabric safe pens.

Of course as always this bag was missing a zipper pocket so I added one on the other side, the zipper almost looks gold in color and matches the fabrics well it is Zipit Zippers Monster snot color!
 I asked my husband to take some pictures, but he never tells me, "hey honey your hair looks crazy" or "tuck in that tummy" so since those pictures um sucked I asked my 4 year old daughter to take one, didn't she do a good job!  I am enjoying some Greek wine Retsina, yummy, taste great with meat, but man it was cold outside.  I tried to do a selfie with the bag, but it ended up being only a selfie and I didn't get the bag in.
I am having a hard time getting my computer to get some of the links so I will put them in later.

18 November 2014

OMG! Vote for me Please!

Oh my Gosh, Oh my gosh! So Sew So very excited and well thrilled and honored and ooohhh.. I got the shivers.  My Piccadilly Circus Bag made it into the top 22 out of 250 plus bags entered.  I am way down almost to the bottom, #21, just barely made the cut.

At the Purse Palooza, just in case you are wondering what I am blabbering about, I wrote about the bag here.  And some more photos, below, I would greatly appreciate your vote!  Go Here to Vote
I do give you permission to look and vote for any other bag that takes your fancy ;) but would really love it if you voted for mine, hehe....

15 November 2014

The Orchid Raccoon

I should call this bag, "The bag that wasn't meant to be", lol.  Let's start at the beginning, I wanted to make this bag for the Pantone Challenge, last March , I had just gotten my charm square Orchid fabrics in a swap and knew that I wanted to do something with them, so I was thinking a 2.5" patchwork exterior with some Tula Pink's Acacia Raccoon print, but the Etsy shop that I ordered the fabric from, forgot to put that print in the order.  The owner of the shop was so nice that she resent that 1 yard of fabric, plus she included a Quiltsmart Interfacing Panel, now she is closing shop, but she still has a few of these panels left.  They are grided with 2.5" squares on them already, perfect for patchwork projects.  Then get this, the package got lost in the mail, and she was so nice and so sweet, she RESENT IT, it finally arrived but to late for the Pantone Challenge, so entered another bag and put this one on the side to do later, well later is today!

This is the Wonderland bag, the 4th bag in the "Big City Bags" book by Sara Lawson.
I made it a little bit blurry, so you could see the face, can you see it?
I was inspired by several things to do the front panel with 2.5" X blocks, the first came from this months Le Challenge calls for all things X, if you haven't heard of Le Challenge, you should check it out, it's really fun and very relaxing, the due date for your handmade makes is on the 15th of each month, and every month is a different Challenge.  Next came this fun piece, if you haven't seen it, pop over and take a look, you won't regret it, plus all of my links take you to new windows, so you can just click away with out worrying about loosing your place on my awesome blog.
Can you see it now?
 Even Alyssa of Pile of Fabric wrote about it in her tutorial about the block Cross Stitch Block Tutorial/Slice and Stitch method.

Fabrics:
Exterior: Tula Pink Acacia - Racoon Canyon
The back and the bottom

Piping (piping got lost in another package and that is also why I was calling this "The bag that wasn't meant to be", but that package just ended up being very late 5 weeks late and it showed up last Friday) 
Interior fabric: Joel Dewberry - Bungalow - Lavender Chevron 
There are pockets inside, but they are very hidden and way at the bottom.
Front Panel: various Kona Greens,  various green Art Gallery Fabrics and various purples 

Emmaline Bags, Handcrafted Metal Zipper Pull, Love these!

Pattern:
The Pattern is pretty easy, I made only 2 changes, I omitted the handles (didn't want them to interfere in the pretty front panel) and added a strap instead and a hidden handle on the side panel.
Flat Handle on the side panel
I also put the bag together differently and sewed the interior to the zipper by machine instead of hand sewing, I am not very good at the hand sewing thing.
This bag is cute, but the zipper portion is so small and the interior is so big, in fact it is perfect to put one of those miniature toy dogs inside of,
oh look, there's one now!
You need a flashlight to see anything inside, so I added this cute little felt Orchid Raccoon and she hides a key-chain flashlight in the back.  

This little cutie idea came from my friend Mary of Mary Moon Designs, she makes the cutest foxes and other felt stuffies, Thanks Mary for being such an awesome swap partner.


Linking to Purse Palooza
and Le Challenge 


14 November 2014

Black and White

The Black and White bag

With a Little Dash of

Red Inside!

This is the 11th bag in the "Big City Bags" book, by Sara Lawson, it is called the Piccadilly Circus Bag and is also the bag on the front cover.

Fabrics:
Exterior Fabric: "Indian Summer-Menagerie Onyx" by Sarah Watson for AGF
Handles: "Architextures- Scribble Notes Charcoal" by Carolyn Friedlander
Interior Fabric: Thank you Shirley for the fun Lobster print by Alexander Henry
LR Stitched Genuine Leather Seude was used for the exterior corner accents and Handle Tabs.
Bottoms: on the exterior a random piece of black on black fabric and on the interior a random piece of red batik. 
Metal Bag Label "Handmade" from Emmaline Bags 

Pattern:
Once again Sara did not include a zippered pocket, so I made one instead of the regular pockets, I just like zippered ones better.  And I also sewed it up a little differently in order to avoid the whole slip-stitching the interior to the zipper thing, so bad at hand sewing of course if I did all of the bags that she has in this book that way I might actually be a pro by now, but I would rather just avoid the whole thing if possible.  I like this bag size and would be willing to sew it up again, I will probably had a detachable strap that is long enough to go over my shoulder since that is the way I like to carry my bags, but if you just like short handles or are a short person then the handle size suggested in this pattern is a great size.  I also did a different handle tab shape, just because I like it better.


Linking to Purse Palooza
and since this is the 11th bag and it is the 11th month I will be linking it to the Big City Bags SewAlong that is going on over at Sewing with Squeak with Angela, you have the rest of the month to sew along if you want to join in on this month and she has changed things and you can sew bag #12 too, that is actually my favorite one, and I have sewed up pretty much all of the bags.

12 November 2014

Honeymooner Suitcase

This is an Up-Cycled Honeymooner Suitcase, the pattern for the bag is in the book "Big City Bags" by Sara Lawson.  It is the 10th project in the book, I actually started making this bag way back in March, when I was making a few children's suitcases.  It sat incomplete, since I wasn't to happy about how the other's finished.
 Since it is a Honeymooner Suitcase, I thought it would be fun to take it to a Greek Wedding, thinking I could take a photo of it with the bride and imagining her packing it with...
some sexy lingerie..
Only to find out that it was a shotgun wedding!  She was 8 months pregnant, the only thing she will be packing anytime soon is...
Diapers and Pacifiers!  In case you are wondering 90% of the weddings I have gone to while in Greece are shot gun weddings where the bride is already pregnant, it's really crazy.
Materials:
Exterior: An old pair of pregnancy overalls
Interior: America w/Flag Manufacturer: Springs Creative 
Piping: Kona Red
Metal Bag Label- Handcrafted Made In the USA, from Emmaline Bags
My butt looks huge in this suitcase.
Pattern:
This is a hard pattern and I made it even easier by omitting the bias tape needed for the interior seams, 
edited:  fellow Honeymooner suitcase pattern maker CeLynn asked how I did this (check out her version here), well, 2 things, I did not cut the side panel in half as suggested in the "Attach the Zipper" section, because I wanted the handle, a pocket and the zipper's to connect at the top of the bag and not at the bottom.
Like CeLynn, I could not find a 48" zipper so I used Two 24" zippers instead, so this made me realize that I did not want them to meet in the middle at the bottom of the bag like in her directions.  I kept the side panel at 6"x48" and added a small 1" x 48" piece of jean fabric to the top of the zipper, and sewed this onto the top of the bag, Sew the interior top fabric right sides together with the top exterior piece and sew together along the zipper, leave a 5" gap at the bottom and turn right side out, hand stitch or machine stitch the opening close.  Top stitch along the 1" piece that is connected to the zipper, now to connect the bottom, I sewed the zipper onto the bottom piece and then when I put the lining in I again sewed it to the zipper, you can't even see the stitches in the photo above since I used a red zipper and red thread, it's great!  Please buy Wash Away Wonder Tape, to make this possible, it is a really awesome product, just stick it along the zipper, then add your folded and ironed edge of fabric, wrong sides together, clip with your Wonder Clips, another totally awesome, go out and buy if you don't have product.  Easy peasy, well until you accidentally run into your zipper teeth and break you needle, but hey, go nice and slow, not all crazy like me.
I broke 3 needles, for some crazy weird reason my top portion of the bag ended up being smaller than the bottom, so I had to do a little reconfiguring when I was sewing the bigger bottom portion of the bag together, I am wondering if I made the top zipper panel smaller or the bottom zipper panel bigger, not sure since I was using up-cycled parts of jeans and sewing them together. 
Top Left, added pleat with buckles underneath to make up for the extra length

I didn't want to rip out all of the stitches afraid I would really screw things up. I know this was my fault, not sure what I did to screw it up, probably when I was re-adjusting adding the cut up jeans together to make the exterior panel.  So I just made a pleat and added some of the overall jeans buttons to the side of the bag, sweet, yah!  And do you like my passport pocket that I made with a back pocket from the pants.
Safe, Secure Pocket under the handle.
 I added a zippered pocket to the interior also.
Also adding a padded shoulder strap out of the overall buckles.
They can hook onto one of the front buckles and the side buckle (pictured above) or they can both go to the two front buckles (like pictured below)
This is me, taking it to the wedding.
Linking up this crazy up-cycled project to the Purse Palooza 2014 over at Sew Sweetness.   I think I really like making up-cycled projects for the Purse Palooza, look what I entered last year.
 

10 November 2014

Cotton and Steel Fabrics, Plus a Swap!

So how's it goin'?
This week I am going to be bombarding you with post, actual finishes, shhh.. don't tell the hubby, I have been sewing up a storm.  But before I get onto some finishes I thought I would show you some pretty fabrics that finally made it, I was in Erin's Cotton and Steel Basics swap and I got so much fabric she had to do 2 packages and we thought 1 got lost in the mail, HAh, is was so scary, but it arrived safe and sound last Friday.
All Stacked Up

All Spread Out

My 2 favorite Prints

And All the funky in between colors.
Well if you are a Cotton and Steel fan, go check out Erin's blog cause she is doing the Fat Eight swaps for the fabric lines, Homebody and August.

Next up the Purse Palooza that has been going on in my house!

29 March 2014

I've been sewing for me, now I want to sew for YOU! GIVEAWAY!

This is Week 4 30/30 Sewing Challenge Update, the final week of a month long challenge all about sewing for yourself.
Last week I told you how excited I was that I got a table for my sewing machine, this week was mostly spent cleaning up the downstairs area, re-arranging furniture and a whole lot of cleaning up to do.  So I only completed one project this week, the Meringue clutch from the "Big City Bags" Book.  I really dislike this bag, so even though I had originally created it for me, I will not be keeping it.
Sewed it all up on my new table
Wednesday- I cut the fabrics
Thursday - Ironed the Interfacings and some other fabric ironing
Friday - I sewed up the St. Patrick's Meringue Clutch
The little glass bead is from my trip to Ireland, this clutch is really stiff and I don't like it at all, will not be making this EVER again, if you really, really like it, I will send it to you :) Someone liked it and it will be flying to it's new home soon, good!
Linking this finish up to

March Finishes
Old Sewing Space, upstairs at the dining room table off of the kitchen, yes there have been a few oil splatters on my fabrics, oops.
I sew barefoot and always need a blanket under my feet, cold tile.
 Pictures of my new sewing space and then a giveaway at the bottom at the post.
Do you remember this picture from last week, this is the front of the house and the 2 windows and balcony doors to my sewing space.
Standing at the balcony door, you see my cutting table.
To the left is a bookcase and door to the upstairs.
The low (old coffee table) I will be re-purposing and making it into a large ironing board.
 All IKEA crap, awesome stuff!
This little side table is with my first color love, Stained glass, I made both pieces you see, the cabinet in a wood working class and the fish stained glass when I was living in Sacramento, CA.  We need to paint the cabinet, especially since the kids have drawn all over it, and I need to screw the doors on as soon as I find the little screws, I have had this upstairs for the past 7 years and I had the doors off since it was in the kids room as a book case and I didn't want them to break the glass, but now it is in MY SPACE!
 I made up some fabric bolts with guess what, canvas boards for painting!  I can find these cheap, 10 for $1 versus the comic boards which I can not find here.  I won't do all of my fabric but a few pieces for "show".

The rest of the room holds a bed and a sofa that can turn into a bed, we sleep down here during the summer.  I need to paint the walls, not sure what color yet.

I really want to Thank Sarah for hosting the 30/30 Challenge because I think it was all of my sewing that I was doing that finally pushed my husband into buying a table just for the sewing machine, Thanks Sarah.


GIVEAWAY:
Now I promised a giveaway, I have been dying to make fabric post cards and I need someone to send them to, would you like one?  I will send it to you for your birthday, or if your birthday was in January, February or March I will pick another holiday to send the card for.  Use the rafflecopter below for an easy entry just enter your birthday, mine is June 5th, you don't have to put the year if you don't want to ;)  I will be having another really big giveaway then and also another giveaway on April 14th, so if you want to keep updated make sure you hit the bloglovin' button.

Follow on Bloglovina Rafflecopter giveaway