20 December 2015

Decorating for Christmas

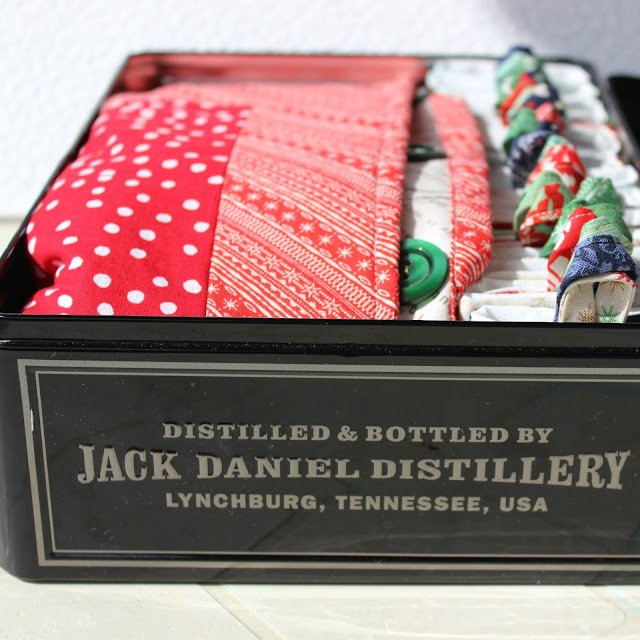
I love making these Hexagon Fabric Tray's, they are a quick and easy sew up project.  The tutorial for how to make them can be found on A Spoonful of Sugar Blog! Her hexagon tray template makes the small sized hexagon, the large size comes from my article in The Make Modern Magazine Issue 8 for my Hexagon Pouch.
My kids and I sewed up these pouches, again another fairly simple sew.
For the medium sized hexagon I just made a template in between my large hexagon and A Spoonful of Sugar small hexagon shape (I will try to have links to both the large size and medium size below, but I am not very computer literate when it comes to doing that kind of thing) The large hexagon measures 5" on each side, it works great with layer cake's, the medium size is 4" on each side.

My kids think that an elf comes in the night to fill up the advent calendar, this is what he has been bringing, chocolate coins and Rabbids figurines, and a few markers.
We also have this beautiful wooden tree, that is decorated with small ornaments, the kids love putting them on and taking them off, and yes we are already missing 2, I'm sure I will find them eventually.
This gorgeous fabric advent calendar that can be used year after year and that I will pass down to my children so they can use it for my some day grandkids is a pattern from Anne Boundy of Said with Love.  More pictures can be found here.
I will be working on a way to get the PDF file up for the larger and medium sized hexagons, if you want them immediately send me an e-mail, grecomara at gmail dot com I am able to forward the pattern since it is a friend you made it up for me in the first place, see not so good with the computer.

Linking to QuiltShopGal for the #NightsBeforeChristmasParty

16 December 2015

Le Challenge - Space

"Space, the final frontier"
Oh wait, that's Star Trek and not Star Wars, Sorry don't want to offend any Trekies or Warsies (what are Star Wars fans called, Chewbaccas?)
I love, love Le Challenge, it is such a great way to get out and make something, like this Star Wars themed toy bag for my son.  It was on my sewing Christmas list, but of course I am getting really down to the last minute in sewing these gifts up, but with the help of Le Challenge, I have it done today, and you would think from the way I am sounding it took ages to do, actually it only took 5 minutes, seriously 5 minute, well plus another 5 to iron, so let's say 10 minutes.
I'm upcycling, isn't that fun, this tank shirt Nik has worn since he was 2, I have a ton of pictures of him in it, so I find it adorable that I get to re-use it as something he can stick the little parts of his soon to be New Christmas Gift.
I trimmed the bottom of the tank top to make it even and then sewed it together, I wrapped the star wars fabric around the tank and cut 1 inch longer on the bottom and on one side 1 inch bigger, then I sewed it right sides together at 1/2", turned it inside out and placed it over the tank top.  I turned down the top, 1/2" and sewed it down to the tank, easy peasy!
It will hang nicely on the end of his bed.
He requested a Castle from Santa, and we bought this huge set up for 20euros, of course I think it will all break within a day or two, but my husband says that is fine.  There are a lot of little parts, so this Star Wars bag will help minimize the amount of SPACE this toy will need.
Linking up to Le Challenge for this months theme, Space!

14 December 2015

SMS Giveaway Winners and Cookie Recipes

Hello Everyone that decided to stop by again, Thank you to all of the new followers following.
The cookie most people enjoyed most is the Chocolate Chip Cookie, hands down :)

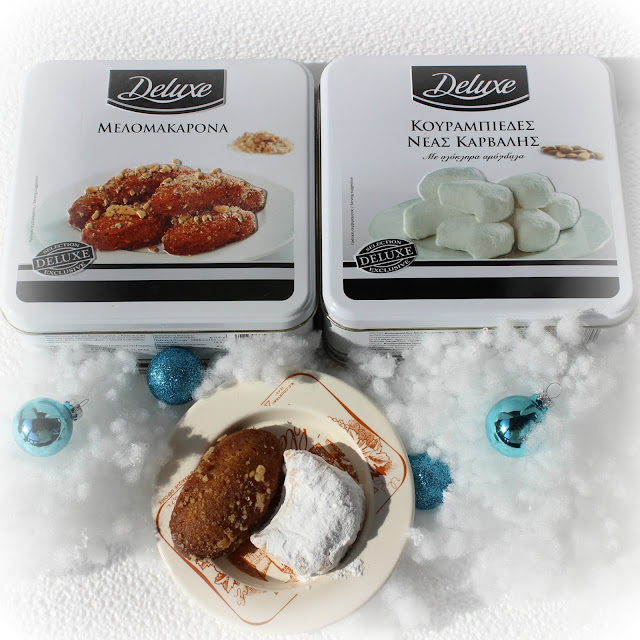
Here are the 2 Greek Christmas Cookies that we eat in our family!

My MIL made these, they are very delicious, and she always makes them in a crescent shape.
I found the Kourabiedes history so interesting, because you can find this cookie World Wide, just by different names, some of the other common names are the Russian Teacake and the Mexican Wedding cookie, read some more and other interesting places you can find it, here on Wikipedia.

This is the recipe my MIL uses from an old Greek Magazine, I have translated it for you. 

Ingredients:
2 cups of real butter (or 4 sticks)
1/2 cup of brown sugar
2 eggs
1 Tbsp. of Vanilla
2 Tbsp. of Baking Powder
1/2 cup Cognac or Brandy (we use Metaxa Cognac here)
3 cups Flour (may need more)
1 cup chopped walnuts (most recipes use almonds so you can use those as well)
Lots of Powdered Sugar (for sprinkling)

Directions:
  1. Cream Butter and Sugar well until it turns white, 
  2.  add in eggs, Vanilla, Baking Powder and Cognac, Mix, 
  3. then slowly add in Flour until firm and then mix in nuts.
Bake for 15 minutes until light golden brown, don't over cook 
While still warm roll in powdered sugar and after they have cooled put even more powdered sugar on them and enjoy.
 

My son's favorite cookie is the Melomakarona,  (look at that even this one is on Wiki, haha!) I actually also love any cookie or cake that is soaked in honey water.  This is a really good recipe, but I would suggest using regular corn or sunflower oil rather than the olive oil suggested, I realize that might not sound very Greek of me, but Olive oil in Baking isn't such a great idea, of course this is my personal opinion.  Melomakarona A Greek Christmas Cookie


Some other cookie recipes that readers suggested as there favorite
Butter Rich Spritz Butter Cookies
Anginetti (Italian Lemon Drop Cookies)
One reader said her favorite cookie was a Kolache, had to look that one up and this recipe looks really delicious, Cream Cheese Kolacky
Jolien sent me this recipe, for a cake cookie, YUM, talking about getting the best of both worlds, Cake and Cookies!  Eierkoeken
Jessica sent me a cookie recipe for World Peace , now wouldn't it be nice if we could have World Peace just by baking cookies!

I hope you get to do some baking this holiday season, I know I will try out at least one or two of these recipes.

The winner of the Tin full of Charms is Judy!  Congratulations.

a Rafflecopter giveaway

09 December 2015

Sew Mama Sew Giveaway - Fabric

Welcome to Mara Creates on your next stop for the Sew Mama Sew Giveaway Day! My name is Mara and I am an American living in Greece with my Greek/Australian husband and our 2 children, I sew to keep my sanity, how about you?

I look forward to this week twice a year and I know you have many places to swing by, today I am giving away a tin Full of charm fabrics cut by me.  These are not my fugly fabrics, oh no, I am giving you some of my favorite fabrics, text prints, low volume, Alison Glass and then your choice of "Weeds" by Me and My Sister or  "Color Me Happy" by V & Co.
Are you on Instagram?  Did you see the recent hashtag #getyourquiltywishesgranted  It is such a fun hashtag and I granted a few wishes, one girl wanted some text prints and strawberry prints, one wanted some low volume prints and another some Alison glass and another a few charms to make charity quilts.  SO while I was cutting up those request I cut up a few more for YOU!
I am giving away one tin this week, here my blog and the other on my IG account, next week, @mara.creates , follow to see when that one happens, I also have another giveaway on there right now from Monday and it ends Monday December 14th.

Next year I am hosting a Year long Sew Along from the book "Sew Fantasy Toys" written by Melanie McNeice , she also designs fabric under the name Melly and Me.  It will be a nice and easy Sew Along, with Giveaways each month, if you are interested, leave your e-mail HERE and I will send out an e-mail with more information closer to the end of this month.

Entering this Giveaway is Easy, Use the Rafflecopter below, so I am sure to have your e-mail address and in the comments
Tell me your favorite cookie and come back next week to see who won this Giveaway and get the recipes for these 2 Greek Christmas Cookies, Melomakarona and Kourabiedes, *cookies will not be included in with the fabric for this giveaway, I am so sorry :(  I will ship Internationally cause, HELLO, I am International :)
My favorite cookie is the Sugar Cookie with frosting on top, like the ones they sale in Grocery stores in the States, yummy!

a Rafflecopter giveaway

All Links to follow are on the right side of this page! 

02 November 2015

Drawstring Bag Toy Play Mat with Zipper

For the Texting While Sewing Contest, with Amy over at During Quiet Time blog.  The challenge was to make a bag that includes a zipper and the design of the bag must use text fabric in a creative way, well I hope I have succeeded.

How easy was that?  A Zipper Text print right there!
I wanted to create something fun for my 4 Kids Christmas Swap Partner.  He is a little boy who loves music and one of the items his mom put in her mosaic was a car play mat, but she also wanted something that could be taken to Grandma's house.  So the perfect thing was a Drawstring Bag Toy Play Mat!  and what is wonderful is that Man Sewing put together a YouTube video on how to make one, I am such a visual learner!


I made 2 changes to the pattern, I made the interior a patchwork I-Spy ABC Quilt! I had to hand quilt it since I injured my back last week and I could not sit at a sewing machine, I love the extra texture it adds to the quilt.

AND I added a zipper in the middle of it so you can fold it up and tuck the toys into the zippered pocket and not worry about the toys falling out as she drives to Grandma's house.
text fabric inside ;)
 On a few of the blocks I embroidered the letter, but not on all of them, there are a few Instrument I-Spy blocks that might be harder to recognize.
These are some of my favorite blocks from the quilt.

Those Jellyfish, so cute, wasn't sure if he would know H for Hen, and those 3 flutes can also be called Nose Flutes!
Sadly enough I did not have enough of the ABC print for the exterior outside so I added a cute Cat Music Text print on 2 ends.


I think I will be making another one in the future, cause my daughter really liked it!  I asked her to pose playing on it for a photo and told her I would only get a picture of her back, she has been on a no photo kick since our vacation this summer.


But then she surprised me!


And asked for all of these photos to be taken, yes she still has a Pacifier, (guilty look by me) but she was sick all last night so she was especially needy for it today.
She lost her tooth 2 weeks ago and this is the first photo she has allowed me to make even though I have begged her for one.  Of course this picture took me a while to get also, but at least she was telling me to keep taking pictures and I was telling her funny things to make her smile.

Please move your Bibila (Pacifier in Greek) out of the way honey so I can take a picture of the zippered text pocket.

Many of the music prints also have text written on them, and I tried to match them up next to there ABC print, so this one says Butterfly and I put it next to the Birds.  Several of these music prints I bought from Sew Me a Song a sponsor of the Texting While Sewing Contest.

Check out the rest of the entrants on IG with the hashtag #textingwhilesewing2


30 October 2015

More Curvy Clutch Hack Clutches!

I have made a few more of my Curvy Clutch Hack Pattern Clutches.
They make great Christmas Gifts, easy and quick to sew up, I like to do them in batches of two's.
I sewed these up for my Sister In Laws for Christmas, I hope they like them as much as I do,  we give out presents at Thanksgiving time since that is when the family gets all together.  I still have to mail mine cause we won't go to the States this year, so they need to go in the mail soon.

The top one has ruffled pockets on both sides.
Simple and beautiful!

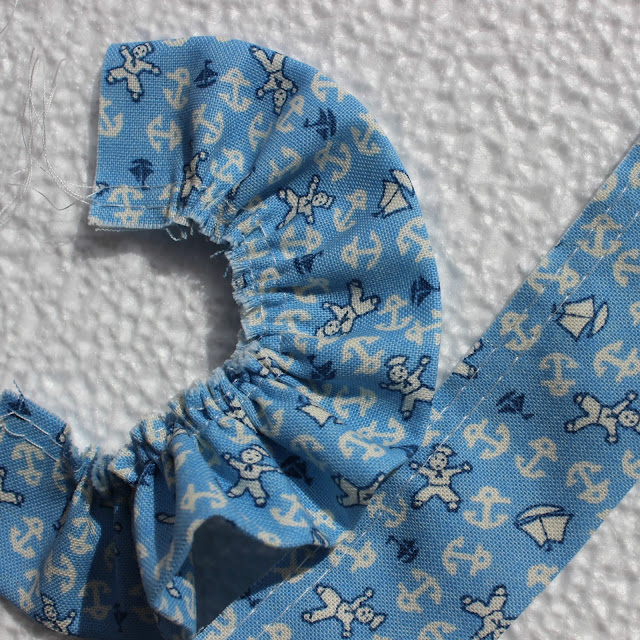
I love the ruffle on this one, I only had a small piece it has little sailors, boats and anchors, so cute!
 Where are you taking your pictures, Mara?
At an abandoned house that overlooks our town of Kalabaka, Greece.
 And just down the street a little bit from our house (not shown in picture, but you can see the road I take to go to our house in the window frame).

You can also make a Curvy Clutch hack minus the ruffles, still bind the pocket piece, and also with out the hardware for the strap.


I sewed one of the pockets shut, so you can easily place your cell phone inside and it won't fall out while you are carrying your clutch.
The open side is next to the strap and the other side looks like a pocket, but I sewed it shut, didn't want to cover the cute girl riding her bicycle with the ruffle so that is why this one did not get ruffles.

I sent this one as a present to a friend who went the extra mile for me.
Will you be sewing up any Curvy Clutch Hack's for Christmas?  Let me know if you do, would love to see them, tag #thecurvyclutchhack if you are on IG.

Linking to Ho Ho Ho and on We Sew over at Ella and Nesta's blog this month!

08 October 2015

The Curvy Clutch Hack

The Curvy Clutch is a Pink Door Fabrics Free Pattern, you can pick it up at their store, The Curvy Clutch Sewing Pattern. 
Everyone loves making it on IG, there are so many inspirational photos, just check out the hashtag #TheCurvyClutch

I wanted to just add a small twist a cute ruffled pocket for the front, to quickly put your phone in and a wristlet handle.

So I bring you The Curvy Clutch Hack Tutorial :)


Read through the instructions first and be sure to grab the instructions for The Curvy Clutch from Pink Door fabrics as well as print the 2 pages with the pattern.

Cutting Instructions:
Main Fabric - (1) 10.5" x 6.5"   (1) 10.5" x 5" for the ruffled pocket
Lining Fabric - (2) 10.5" x 6.5"
Ruffle Fabric and Binding - (3) 2 1/4" x 10"  
White Fabric -  (1) 10.5" x 6.5" goes behind the ruffled pocket (1) 10.5" x 5" the lining of the ruffled pocket (2) 2" x 9" the interior of the curved accent piece
(I used white fabric for the clutch pictured above, but use whatever you like)
Accent Panel - (2) 2 x 2" for the zipper tabs (2) 2" x 9" , cutting these and the 2 plain or white pieces above as the accent panel following the dark line on the bottom NOT the dash line from the pattern piece given in the Curvy Clutch pattern, page 8
Wristlet Strap - (1) 1 3/4" X 2 1/4" D-ring tab, (1) 1 3/4" X 10" (for a child) or 15" (for an adult)

Hardware: 1/2" D-ring and 1/2" Swivel Snap Hook , I get my hardware supplies from Emmaline Bags.

Interfacing (the pattern calls for 6 pieces of SF101, that's a lot for me, it is so hard to find here, so I have substituted it with Pellon TP971 Fusible Thermolam) (2) 10.5" x 6.5"

Fist Step:  Sew the Accent Panels together, following the directions from the Curvy Clutch Pattern, Step #3, remember you have cut yours on the solid line and not the dash line

Ironing:
  1.  Iron the 2 Accent Panels you just sewed above.
  2.  Iron the Fusible fleece to the 2 fabric pieces that are 10.5" x 6.5" (one Main fabric and one White fabric)
  3.  Iron your zipper pull fabric and the 1 3/4" wristlet strap fabrics like she shows you in the Curvy Clutch Pattern Step #7
  4. Iron the (3) 2 1/4" x 10" strips in half lengthwise, (making your pocket ruffle and binding)
Making the Wrist Strap:
  1. In the Ironing Section Step #3 you ironed a 1 3/4" x 10" (or 15")  piece into 4, now follow this easy tutorial on how to make your strap.

Triming and Cutting:
  1.  Trim the Fabrics you ironed above in step 2 using the Curvy Clutch Pattern Piece Main Panel, also trim your Two Lining Fabric cuts.
  2. Cut (1) Ruffle Fabric that you ironed in step #4 above in half to make (2) 2 1/4" (but now ironed in half) x 5" pieces (this will be your ruffle pocket binding) 
  3.  Place your 10.5" X 5" Main Fabric and White Fabric wrong sides together, Mark a line 3" from the top and 3" down,  Cut a diagonal line. 

Making the pocket is as easy as 1, 2, 3, 4! 

Sewing it All together:
  1. Let's make the ruffles first, set your sewing machine to the longest stitch and sew 1/8" away from the raw cut edge, on both ruffle pieces, make sure to leave long tails at the beginning and end of each piece.  Then sew again 1/4" away from the raw edge, Pull the top thread to create your ruffle.
  2.  Reset your stitch to it's normal setting and sew a 1/8" seam at the top of your pocket pieces (one piece main fabric and one piece white fabric) wrong sides together. (this is to keep them from wiggling around while sewing on the ruffles and binding)
  3. Sew the ruffle to the pocket opening raw edges together a tad less than a 1/4", leave some of the ruffle hanging off both ends so you can trim down and have them in the seam allowance.
  4. Take your binding piece and using wonderclips align the raw edge with the raw edge of the ruffle you just sewed on, flip it over and on the back side you should see the stitching from when you sewed down your ruffle, now sew just outside of that line it should be 1/4" to 3/8" 
  5. Flip the binding over and to the back and sew down from the front just under the binding to catch the folded edge on the back side.
  6. Now you have your ruffled pocket align the bottom raw edge of it to your 10.5" x 6.5" White Fabric and edge stitch 1/8" on the bottom. 
  7. Take one of your Curved Accent Panel Pieces and align it with the top of the Main Panel, be sure to cover the top of the ruffle pocket and follow the directions from the Curvy Clutch Pattern, Step #6, 
  8. Flip over your pocket piece and trim the ruffle and triangles to match the White Main Panel.
  9. Do the same thing with the other Main Fabric Panel Piece and Curved Accent Panel, following the directions from the Curvy Clutch Pattern, Step #6 this is your back piece.
  10. Attach your folded 1 3/4" D-ring tab to the the panel piece.
  11.  You already ironed your zipper tabs above in the ironing section step #3 now follow the directions in the Curvy Clutch Pattern Step #7 to attach them to your 7.5" trimmed zipper.
  12. Follow the steps 8 through 14 of the Curvy Clutch Pattern add your wrist strap that you made above and TaDa you know have a Ruffled Curvy Clutch!
If you make one be sure to use the hashtag #thecurvyclutchhack would love to see what you make.
If you have any questions, don't hesitate to ask!

Fabric used for this Curvy Clutch Hack are all Michael Miller Fabrics:
Lining and Accent: Out to Sea by Sarah Jane
Main Print: Color Me, Princess Paisley by Haley Crouse
Ruffle and Binding : Cotton Couture in color Peta

Linking to Bag it event over at Elm Street Quilts
          

22 September 2015

Said WIth Love Advent Calendar

Hello Everyone,
From the title you probably guessed I am getting ready to Celebrate Christmas Early!  And I am so excited that it is only 3 months away, can you believe it?
Are you ready to celebrate?  Do you have a hand made Advent Calendar to help you celebrate, or would you like to make one?

This is the Advent Calendar created by Anne Boundy of Said With Love.


Anne is hosting a Sew Along to make your own Advent Calendar, it is a relaxed Sew Along and there is no pressure, but I know I will be so excited to hang mine up on December 1st, here are the dates for the Sew Along.

Our Sew Along Schedule

26th Septemberpurchase the pattern (a PDF will be emailed to you), select your fabric and start cutting
3rd October – start making the pockets
10th October – finish all the pockets (there are 25 of them to make!)
17th October – make the tree main section and borders
24th October – sewing on the buttons
31st October – catch up
7th November – quilting and binding
14th November – round up of the sew along
If you are on Instagram you can show your progress with the hashtag #SWLAdventCalendarSAL

I must admit my favorite part was decorating the tree, it went from this

to this.
added some buttons on the tree with metallic thread and little puffed up presents underneath.
The big buttons were fun to put on too, especially with my button pins, haha.
Taking photos of it was hard, since it does come out to a fairly large size, I had to stand on a chair in order to get a full picture of it and our little stray kitty was wondering just what I was doing.
I have it all packed up right now and can't wait for the next 68 days to pass so I can hang it up properly.
I was a pattern tester for the Said With Love Advent Calendar, but I do love this pattern, it is charm pack friendly and you use all of the little pieces of fabric, and this will be a family treasure.
Are you going to join us in the Sew Along?  You can find the pattern here.


16 August 2015

FABulous Home Sewn

I want to introduce you to my friend Fenna of FABulous Home Sewn, go on over to her blog and browse around, she sews lots of things for her kids, she has 5!!
You can read more about her in the Canadian Pattern Designer Blog Hop, where she was featured this summer as one of the Great Canadian Designers!
And she makes the most wonderful patterns that make up great gifts for children or even for yourself, she is working on a handbag right now the pattern should be out soon and it looks fantastic.

She is giving one of her patterns above, the winners choice, to my 4 Kids Christmas Swap Participants, who made their mosaics and posted them on IG.

Drumroll.......And the winner is: Threehoneybees,   Congratulations!!!

Here are a few more pictures and some links to more of what I have made with her patterns, I have the Perfect Petal Purse and the Pirates Treasure Wallet, all of her patterns can be found on Craftsy.
 It is so hard to find something to sew up for boys, I have made these for my nephews and 2 for my son, the picture below shows it in action, he loves being able to pay for things by himself.
I have made 4 perfect petal purses, now I cheat a little when making them, I sew the interfacing onto a strip of fabric when making the leaves and then I sew the strips right sides together around the cut out leaf interfacing and then cut the leaves with my wavy rotary cutter, it makes making this purse super easy and can be done within one day and looks super adorable!  See more pictures here, with that change to the pattern.
 A BEE-autiful Sunflower Perfect Petal Purse, I just doubled the petals on this one.
Do I have any money?

More photos can be found here, here, here and here.